Hey there!
This week, Thomas has been begging me to bake. So, finally, I agreed that if he would be my photographer, I would bake up some peanut butter cookies.
I love peanut butter, and this recipe is super super easy. I think I finished these cookies faster than any I've ever baked--the process took less than 45 minutes total.
You'll need:
First, soften the butter.
Next, mix the dry ingredients.
Blend together the butter and peanut butter, then add the sugars.
Add the egg.
Next, gradually add the dry ingredients.
The dough will be fairly sticky, and should form a ball.
Scoop the dough in 3/4 inch rounds onto an ungreased baking sheet, then gently press it down with a fork.
Sprinkle the raw cookies with sugar (I used sugar in the raw) and bake at 350F for 8-10 minutes.
Peanut Butter Cookies
Ingredients:
1/2 cup butter, softened
1/2 cup peanut butter
1/2 sugar
1/2 cup brown sugar
1 egg
1 1/4 cup flour
3/4 teaspoon baking soda
1/2 teaspoon baking powder
1/4 teaspoon salt
Directions:
Cream softened butter and peanut butter. Add sugars and egg. Gradually add dry ingredients. Bake on an ungreased baking sheet an inch apart. Flatten the cookies slightly with a fork, then bake for 8-10 minutes at 350F.
Enjoy!
Kinsey
p.s. Charlotte is a coat keeper.
Showing posts with label recipes. Show all posts
Thursday, February 2, 2012
Saturday, January 28, 2012
Mastering Chocolate Pie
(Note: This is a very picture heavy post).
Throughout my baking career, one of the things I've had the toughest time mastering is the custard pie. Whether it be lemon, coconut, or chocolate, custard pies are an exact--and very fragile--science.
My grandmother has a great chocolate pie recipe, and my dad and brother absolutely love it. They request one for every holiday, so it was pretty imperative that I get a handle on it.
As I've practiced making custard pies over the years, I've had several successes--but I've also had several failures. I think baking can be a really intimidating concept for someone who isn't familiar with it, but trust me--even though I worked in a bakery for several months and have been cooking for as long as I can remember, I still make lots and lots of mistakes.
Some of my favorite "big fails" have included:
1. While making a custard pie, I was supposed to pre-bake the crust. I only remembered that fact after pouring the cooked custard into the crust, and topping it perfectly with meringue. There was no going back.
2. While attempting to 'lightly toast' the meringue, I turned the broiler on and left it for just a tidge too long--and it caught on fire. This has actually happened twice...maybe even three times.
3. Similarly, while baking a pumpkin pie with walnut streusal topping (I blogged about the recipe a few months ago), I forgot to turn the oven down midway through the baking process. This resulted in blackened walnuts, and a pretty dark crust. Oops!
I feel like it's absolutely important to be honest about my failures as a baker, because it happens to everyone. I think baking can be extremely intimidating, and it's important to own up to the fact that even 'good bakers' screw up. That said, screwing up is no fun, and I've decided once and for all that I will master the chocolate pie.
So, I started out with a recipe of my grandmother's. Here's what you'll need:
First, bake up the crust (don't forget to do this). I used a store bought crust for this pie. Ohhh, scandalous.
When baking a one crust pie, you can either use pie weights (my favorite method) or poke a bunch of holes in the crust to avoid major puffiness while baking. It looks kind of like constellations, yes?
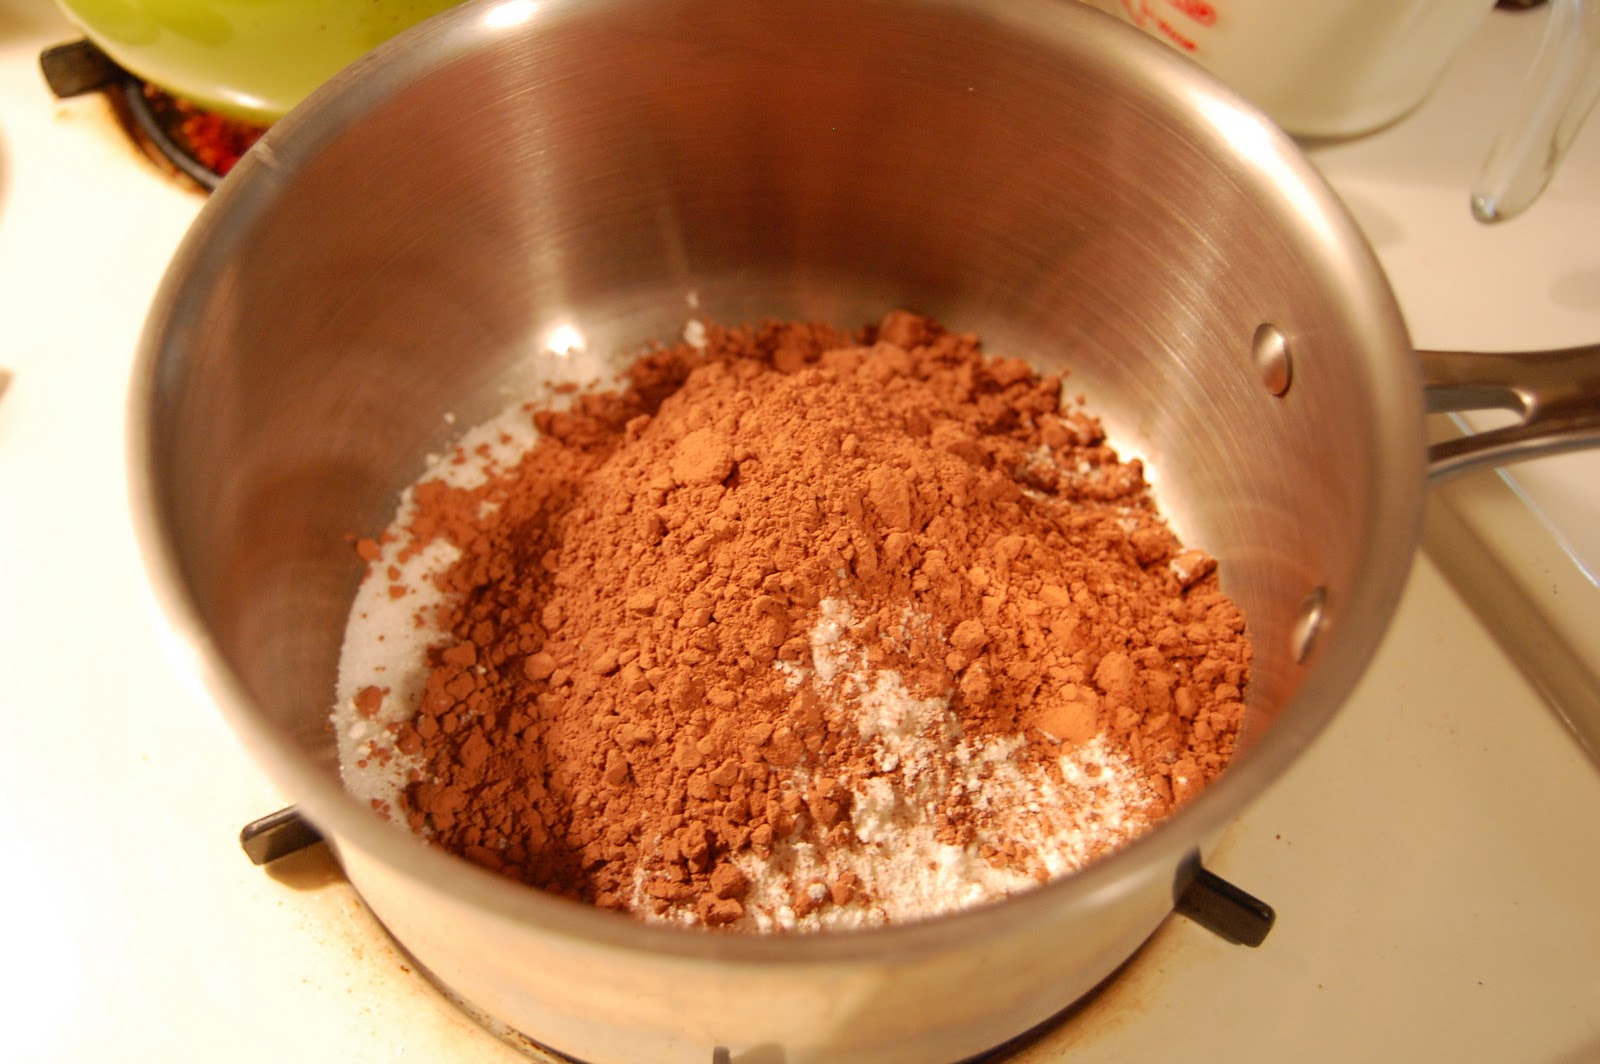
While the crust is baking, mix the sugar, cocoa, and flour in a large saucepan.
Add the milk and stir constantly over low heat until the mixture thickens. Stirring constantly is extremely important, as milk scorches very easily (yes I have scorched milk, many, many times).
I have always found this part of custard pie making the hardest. What is thick? How long will it take? Is it taking too long? Did I ruin it? Will anyone want to eat my pies again? I'm telling you, it can get trying. I timed this pie, and it took around 16 minutes to get to satisfactory thickness (cooked over low-medium heat). So hopefully that will help you avoid the emotional roller coaster mentioned above.
Meanwhile, separate three egg yolks and set them aside in a medium bowl.
After the mixture is sufficiently thickened (see picture just below), add the egg yolks.
Instead of adding the yolks directly to the hot mixture (which would most likely result in scrambled eggs floating around in your chocolate pie), beat the egg yolks in a small bowl, then pour a few tablespoons of the hot filling into the yolks, beating constantly to avoid scrambling.
This process is called tempering.
Once you've mixed the yolks and chocolate substantially, pour the yolks into the rest of the chocolate mixture.
Cook the mixture for a few more minutes--say 2 to 5--stirring constantly. Then, remove it from the heat and add the butter and vanilla. Stir until the butter is melted.
Finally, pour the chocolate filling into the baked crust.
I know it seems weird, but you'll want to immediately cover the filling with plastic wrap. This will keep that disgusting custard pie slime from forming (if you've made a custard pie before, or even eaten one, you probably know what I'm talking about) as the pie cools.
I broke away from what I normally do with this pie by topping it with whipped cream instead of meringue. I'm not a huge fan of meringue, so I decided to give whipped cream a chance.
After I finished beating up the cream, I took the pie out of the fridge and peeled away the saran wrap. I was quite pleased to see NO film!
Then, I piled the whipped cream on top, and spread it all out. I'll admit, I may have made a bit too much whipped cream.
A few mini-chocolate chips for garnish, and wahlah!
Chocolate Pie
Ingredients:
1 c. sugar
1/3 c. cocoa
4 Tablespoons flour
2 c. milk
3 egg yolks
2 Tablespoons butter
1 teaspoon vanilla
Whipped cream
Directions:
Bake the crust, following the directions for a one crust pie. Then, mix the sugar, cocoa, and flour in a large sauce pan. Add the milk and cook over low heat, stirring constantly until thickened (about 16 minutes). Temper the egg yolks, then add them to the mixture and cook 2-5 more minutes. Remove the filling from the heat and add the butter and vanilla. Stir until the butter is melted. Pour the filling into the crust, then cover it with saran wrap and allow it to cool completely. Refrigerate for a few hours, then top with whipped cream or meringue.
Enjoy!
-Kinsey
Throughout my baking career, one of the things I've had the toughest time mastering is the custard pie. Whether it be lemon, coconut, or chocolate, custard pies are an exact--and very fragile--science.
My grandmother has a great chocolate pie recipe, and my dad and brother absolutely love it. They request one for every holiday, so it was pretty imperative that I get a handle on it.
As I've practiced making custard pies over the years, I've had several successes--but I've also had several failures. I think baking can be a really intimidating concept for someone who isn't familiar with it, but trust me--even though I worked in a bakery for several months and have been cooking for as long as I can remember, I still make lots and lots of mistakes.
Some of my favorite "big fails" have included:
1. While making a custard pie, I was supposed to pre-bake the crust. I only remembered that fact after pouring the cooked custard into the crust, and topping it perfectly with meringue. There was no going back.
2. While attempting to 'lightly toast' the meringue, I turned the broiler on and left it for just a tidge too long--and it caught on fire. This has actually happened twice...maybe even three times.
3. Similarly, while baking a pumpkin pie with walnut streusal topping (I blogged about the recipe a few months ago), I forgot to turn the oven down midway through the baking process. This resulted in blackened walnuts, and a pretty dark crust. Oops!
I feel like it's absolutely important to be honest about my failures as a baker, because it happens to everyone. I think baking can be extremely intimidating, and it's important to own up to the fact that even 'good bakers' screw up. That said, screwing up is no fun, and I've decided once and for all that I will master the chocolate pie.
So, I started out with a recipe of my grandmother's. Here's what you'll need:
First, bake up the crust (don't forget to do this). I used a store bought crust for this pie. Ohhh, scandalous.
When baking a one crust pie, you can either use pie weights (my favorite method) or poke a bunch of holes in the crust to avoid major puffiness while baking. It looks kind of like constellations, yes?
While the crust is baking, mix the sugar, cocoa, and flour in a large saucepan.
Add the milk and stir constantly over low heat until the mixture thickens. Stirring constantly is extremely important, as milk scorches very easily (yes I have scorched milk, many, many times).
I have always found this part of custard pie making the hardest. What is thick? How long will it take? Is it taking too long? Did I ruin it? Will anyone want to eat my pies again? I'm telling you, it can get trying. I timed this pie, and it took around 16 minutes to get to satisfactory thickness (cooked over low-medium heat). So hopefully that will help you avoid the emotional roller coaster mentioned above.
Meanwhile, separate three egg yolks and set them aside in a medium bowl.
After the mixture is sufficiently thickened (see picture just below), add the egg yolks.
Instead of adding the yolks directly to the hot mixture (which would most likely result in scrambled eggs floating around in your chocolate pie), beat the egg yolks in a small bowl, then pour a few tablespoons of the hot filling into the yolks, beating constantly to avoid scrambling.
This process is called tempering.
Once you've mixed the yolks and chocolate substantially, pour the yolks into the rest of the chocolate mixture.
Cook the mixture for a few more minutes--say 2 to 5--stirring constantly. Then, remove it from the heat and add the butter and vanilla. Stir until the butter is melted.
Finally, pour the chocolate filling into the baked crust.
I know it seems weird, but you'll want to immediately cover the filling with plastic wrap. This will keep that disgusting custard pie slime from forming (if you've made a custard pie before, or even eaten one, you probably know what I'm talking about) as the pie cools.
I broke away from what I normally do with this pie by topping it with whipped cream instead of meringue. I'm not a huge fan of meringue, so I decided to give whipped cream a chance.
After I finished beating up the cream, I took the pie out of the fridge and peeled away the saran wrap. I was quite pleased to see NO film!
Then, I piled the whipped cream on top, and spread it all out. I'll admit, I may have made a bit too much whipped cream.
A few mini-chocolate chips for garnish, and wahlah!
Chocolate Pie
Ingredients:
1 c. sugar
1/3 c. cocoa
4 Tablespoons flour
2 c. milk
3 egg yolks
2 Tablespoons butter
1 teaspoon vanilla
Whipped cream
Directions:
Bake the crust, following the directions for a one crust pie. Then, mix the sugar, cocoa, and flour in a large sauce pan. Add the milk and cook over low heat, stirring constantly until thickened (about 16 minutes). Temper the egg yolks, then add them to the mixture and cook 2-5 more minutes. Remove the filling from the heat and add the butter and vanilla. Stir until the butter is melted. Pour the filling into the crust, then cover it with saran wrap and allow it to cool completely. Refrigerate for a few hours, then top with whipped cream or meringue.
Enjoy!
-Kinsey
Wednesday, November 23, 2011
Pecan Squares are way cooler than Pecan Pie.
Happy Thanksgiving Eve!
Last night after work, Thomas and I met some coworkers at nearby Flip Burger for dinner. Flip is kind of a schmancy looking place, but the prices are fairly reasonable and the food is unique and tasty.
Thomas started off the meal with a pistachio and white truffle milkshake.
I had the rbq burger--brisket with coleslaw and smoked mayo. SO GOOD. The waitress switched our sides, so this is Thomas' side, the Moroccan Cauliflower Salad.
Thomas had the Butcher's Cut burger--grassfed beef, bleu cheese, caramelized onions, pickled shallots, and soy truffle vin. Also pictured: MY onion rings.
Today was a short day at work, and I started baking as soon as I got home. On the to-do list for this afternoon was pecan squares and a traditional pumpkin pie.
The pecan square recipe I used is from Thomas' mom and grandmother, and they've gotten rave reviews every time I've been around. They're a fun pecan pie alternative, and they're super easy to make. Here's what you'll need (Hint: SO.MUCH.BUTTER):
First, sift the flour and powdered sugar together in a large bowl.
Add 3/4 cup of softened butter and mix it until it's course, using your hands or a pastry blender.
Next, press the mixture into a lightly greased 9x13 pan.
It should look like this when you're done pressing.
Bake the dough at 350F for 15 minutes, until just brown around the edges. Cool.
While you wait, find your cat sitting in a chair and photograph her.
In a sauce pan on medium to high heat, mix the brown sugar, honey, cream, and 2/3 cup butter.
Boil the mixture until it gets all bubbly.
Then, add the pecans.
Pour the molten filling into the crust, then bake at 350F for 25-30 minutes.
And, wahlah! Allow to cool completely before serving (this is why there isn't a cut up picture yet).
Pecan Squares
Crust:
2 cups flour
2/3 cup powdered sugar
3/4 cup butter, softened
Directions:
Sift together the flour and powdered sugar. Cut in the softened butter using a pastry blender or fork until the mixture resembles course meal. Pat the mixture into the bottom of a lightly greased 9x13 pan. Bake at 350F for 15 minutes or until edges are lightly browned. Cool.
Filling:
1/2 cup firmly packed brown sugar
1/2 cup honey
2/3 cup butter
3 tablespoons whipping cream
3 cups coarsley chopped pecans
Directions:
Bring brown sugar, honey, butter, and whipping cream to a boil over medium-high head. Stir in pecans, then pour hot filling into crust. Bake at 350F for 25-30 minutes until golden and bubbly. Cool completely before cutting into 2-inch squares.
Tomorrow's list includes:
1. A big mess o' homemade crescent rolls.
2. Two containers worth of scalloped potatoes.
3. Deviled eggs? I've been craving them, so we'll see what happens...
-Kinsey
Tuesday, November 22, 2011
$100 Chili
Yesterday Thomas won a chili cookoff at work!
I'm super proud and am allowing him to spend the winnings ($100!) on whatever he desires. Thankfully I saw this win coming and took lots of pictures of the process so that I could do a recipe tutorial, so here it is!
You'll need:
And:
Begin by chopping your veggies in 1/4-1/2 inch dice.
Be sure to scrape the seeds out of your jalapenos, unless you want to burn everyone's faces off.
Next, chop up the chipotles in adobo.
Then blacken the poblano chiles over an open flame (if possible).
Be careful. Don't light yourself on fire. Try to roast them evenly.
As soon as you're done with one, wrap it in saran wrap immediately so it can steam. The KEY here is steam. Once they've steamed for a few minutes, slough the burnt skin off with your hands (gross sounding. Just do it). Try to get as much of the black stuff off as possible. Cut up the chiles in a similar size dice to what you've already done.
Cube the chuck roast with a 1/2 inch dice.
Heat up a large skillet or dutch oven until it's really nice and hot. Cover the bottom of the pan with bacon grease or vegetable oil, then brown your meat in batches being careful to leave a bit of space between each piece of meat. Once the meat is in the pan, let it sit while the color develops for a minute or two before moving it.
Once you've finished up the beef, if the oil is a little 'trashed,' get rid of it, but leave all the yummy stuff in the bottom. Add a fresh coat of grease or oil, and reheat the pan. Put in your veggies (all except the chipotles in adobo) and the chile powder.
Reduce the heat to medium. Saute it all for around 6-7 minutes, until the onions are nice and translucent. Add the chipotles, the cumin, the oregano, and salt and pepper. Saute for another 2 minutes or so.
Next, deglaze using a quarter cup of whiskey and a bottle of a full bodied--but not too dark--beer. Let it reduce by 1/2, then add the meat back in. Add the tomatoes, and crush them up with your hands into the pot.
Once everything is in and all coated up, add the chicken stock. Throw in a bundle of thyme and take it out an hour or so in. Bring the whole pot to a boil, then let it simmer partially uncovered stirring occasionally for 2.5-3 hours. If it reduces a little too much or gets kind of dry, feel free to add a little more chicken stock.
In the last half hour, make a roux using 2/3 of a stick of butter and 1/3 cup of flour. Foam the butter and cook the rue until it's a medium to dark brown and has a toasty smell
Whenever the meat is to the desired tenderness, turn off the heat on the pan and add enough rue to achieve your desired thickness. Make sure the rue is mixed in well and cover the pot. Let it sit off the heat for at least 1/2 hour. It's even better if left in the fridge over night.
Thomas' Texas Chili
Ingredients:
6 cloves garlic, minced
1 medium onion, chopped
3 large (or 4 medium) jalapenos, scraped of their seeds
2/3 a cup of carrots, chopped
2/3 a cup of celery, chopped
2-4 chiles in Adobo (depending on your heat preference), chopped
3 poblano chiles, chopped
2.5-3lb. USDA Prime Chuck Roast (with a decent amount of fat on it), cut to 1/2 dice
5-6 tablespoons of ancho chile powder
1 1/2 tablespoons of cumin
1 tablespoon Mexican oregano
Salt and pepper to taste
1/4 cup whiskey
1 (14 oz) beer
4 cups chicken stock
1 thyme bundle
1 can of whole tomatoes, crushed by hand
Roux:
2/3 stick of butter, melted
1/3 cup flour
Directions:
1. Begin by chopping the onion, jalapenos, carrots, celery, and chiles in adobo in 1/4-1/2 inch dice.
2. Blacken the poblano chiles over an open flame, then wrap them in saran wrap to steam. Once they've steamed for a few minutes, slough off the blackened skin and chop then into a 1/2 inch dice.
3. Start heating a large skillet or dutch oven. Once hot, add a layer of vegetable oil or bacon grease. In the meantime, cube up the chuck roast in a 1/2 inch dice.
4. Brown your meat in batches being careful to leave space between each piece.
5. Throw out the old oil if necessary, then add new oil and reheat the pan. Add the veggies except for the chipotles in adobo, as well as the chili powder.
6. Reduce the heat to medium. Saute it all for around 6-7 minutes, until the onions are nice and translucent. Add the chipotles, the cumin, the oregano, and salt and pepper. Saute for another 2 minutes or so.
7. Deglaze using a quarter cup of whiskey and a bottle of a full bodied--but not too dark--beer. Let it reduce by 1/2, then add the meat back in.
8. Crush the tomatoes up with your hands and add them to the pot.
9. Once everything is in and all coated up, add the chicken stock.
10. Throw in a bundle of thyme (which you'll take out an hour or so in). Bring it all to a boil, then let it simmer partially uncovered stirring occasionally for 2.5-3 hours.
11. In the last half hour, make a roux using 2/3 of a stick of butter and 1/3 cup of flour. Foam the butter and cook the roux until it's a medium to dark brown and has a toasty smell. Turn the heat off.
12.Whenever the meat is to the desired tenderness, turn off the heat and add enough rue to achieve your desired thickness. Make sure the rue is well mixed in and cover the pot. Let it sit off the heat for at least 1/2 hour. Serve with sour cream or crema.
I know there are a million steps, but trust me, it's delicious! Enjoy:]
-Kinsey
Subscribe to:
Posts (Atom)